
We have three dump valves on the 42' Tour -- two grey tanks (60 gallons each) and the black tank -- also 60 gallons. I really like the large size of these holding tanks and they have worked well. However, after a few months of daily use, the valves start to get sticky and work with difficulty. Time to add grease fittings!
I originally got this idea from Mark Nemeth, Escapees' technical director and first used it on our 2008 coach. The modified dump valves worked great and I had no problems over 2 years of fulltime use, so I decided to do the same modification on our new coach.

Here are the few tools needed. You will need to get one 1/4" zerk grease fitting for each dump valve (I got mine at Lowe's), a 1/4" x 28 thread thread tap, 3/16" drill, and of course, a grease gun with grease. The zerk fittings are only a buck or so and the tap is just a few dollars, so this is a very inexpensive modification.

First, drill the hole above the drain valve handle, being sure that the hole will be within the dump valve body cavity as shown above. Then, use the tap to create threads in the plastic valve housing. I did not have a regular tap handle, so simply used a 3/32 socket and ratchet to hold the tap -- worked great.


After repeating this procedure for all valves, enjoy the smooth opening and closing of the valves. I found that I did not need to re-grease the valves on our prior coach more than once a year to keep the valves working freely.
9 comments:
Wow! I have been just spraying the shafts with dry silicone lube every few months. So far that has been working good for the last five years.
But that does look like a good modification.
I have a 2008 TOUR with the same problem. Does this grease lubricate the actual gate that closes the drain. My valve slides easily until the actual gate closes and then I need to exert a lot of pressure. Will the grease deteriorate the rubber or plastic gate? I have used a gel for that purpose in an empty tank but its effectiveness is short lived. A reply would be appreciated.
I have a 2008 Tour with the same problem. Does the grease actually reach the rubber valve gate to lubricate it? My handle and shaft slides easily until the gate pushes in. I tried a gel for that purpose dropped into an empty tank but the results are short lived.
Comments? RNM
I had the same problem of resistance in the last part of closing the slide valve -- this modification totally fixed this resistance.
I cannot say for sure that the grease will not cause longterm issues with the seal -- but I can say that there were absolutely no problems after 2 years of use with the grease fittings. I wondered about this issue as well before I did it on our 2008 coach, but decided the sticky valve was worse than the other issue. Based on the lack of problems after two years, I am not worried about such issues, so did it on our new coach as well.
I like the results after getting grease inside my dump valves, but I did have a little problem...given Rick's success, hopefully my problem was unique to me!
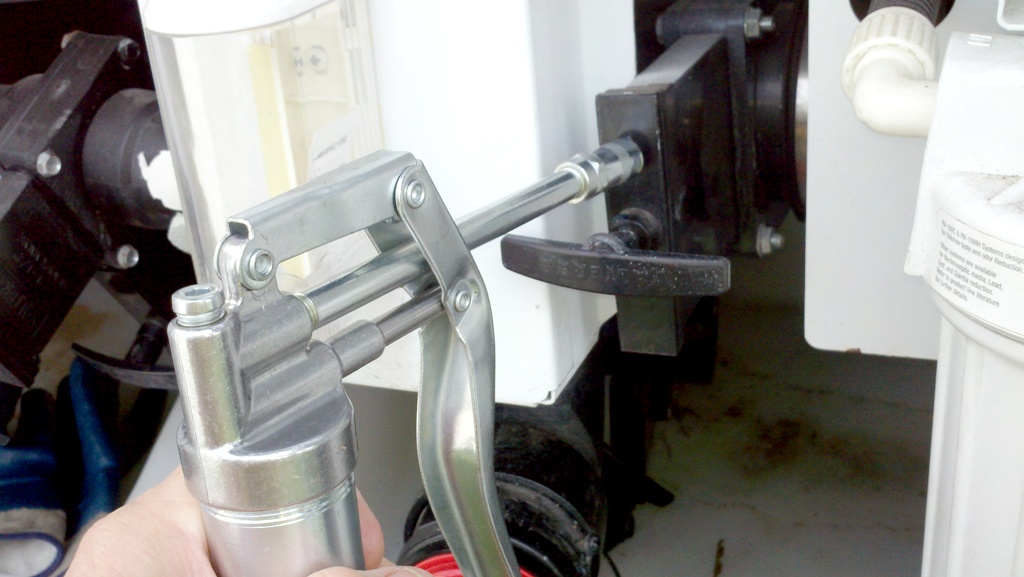
I got the zerk fitting installed just fine, snapped on the grease gun, and pumped away until the valve was working nice and smoothly. Then I tried to disconnect the grease nozzle. Don't know if it was because my grease gun and tip was new, but it would not easily pop off. In fact, I was struggling, and apparently so much that the plastic threads in the dump valve finally gave way, and the zerk pulled completely out of the valve still attached to my grease gun nozzle! Of course this left a nice hole in the dump valve which leaks when the valve is opened (not what you want), now temporarily filled by a foam ear plug!
Just wanted to let others know of my experience. Murphy's Law strikes again.
Gary
Yes, I noticed that the grease gun might seem difficult to remove from the fitting. I found that moving the gun off to one side helped release it, rather than pulling it off straight.
If the Zerk fitting pulled out, you might consider enlarging the hole in the valve, screwing in a threaded insert fitting (1/4") and then screwing the zerk fitting into the threaded fitting you just installed.
You could also install 1/4 npt threaded grease zerks. for your information you should always disengage a grease zerk by twisting the grease gun end off to one side, this is part of there design
Rick,
Thanks for this great idea. I installed the zerk fittings today, but I haven't filled the valve cavaties with grease yet.
A question for you or others in the know...would marine grease work better than standard automotive grease?
Craig
Rick
I do not think Marine grease would help as it is very water resistant and would gunk up after awhile , all NGL2 grease is water soluble it is just water resistant
Post a Comment